Zen and the art of digital blending
How to digital blend multiple shots to reduce noise and expand dynamic range
Zen... and the art of digital blending
** Disclaimer **
If you are one of those who think that Photography is only a straight-out-of-the-camera shot... please, don't go on. if you think Photography should be made by polaroids only... stop here. This shit is not for you. Believe me!
On the contrary... if you think that Photography is an art... and as an art it is totally logical to process the shot according to your vision... if you think that Photography is not reality (it's quite weird to believe it... since the dynamic range of a digital sensor is absolutely nothing compared to our eyes and how the brain processes what we see)... in this case, please read on!
What a challenging shot!
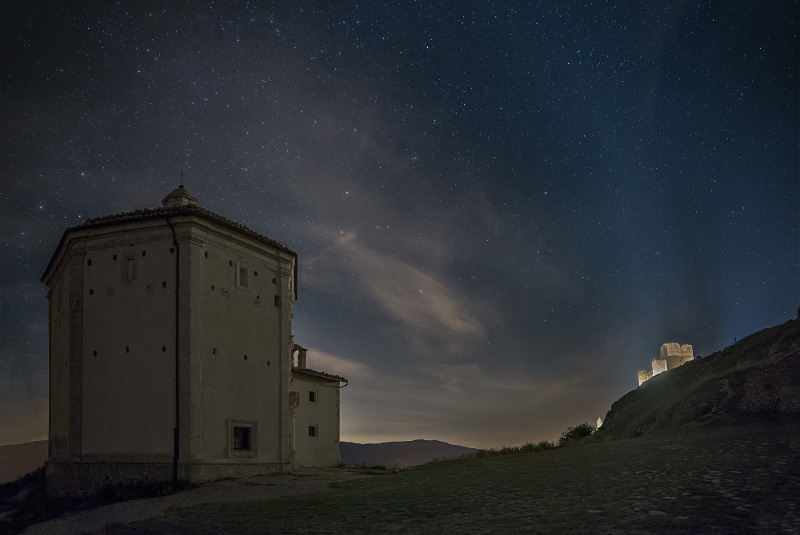
I took this shot in Rocca Calascio 2 years ago. I was absolutely sure of what I wanted to achieve, but at the same time I was aware that such a final result was beyond my possibilities. At least 2 years ago. So I decided to keep my RAW files for the future, hoping to be able to make my vision come true.
There were multiple problems:
- I wanted the stars still, so I have to keep in mind the "rule of 400" for the shutter speed. I know my equipment, and for that result I knew I have to go with a 25s exposure, not more
- For a 25s exposure, I had to use high ISOs (2500), so I was expecting a quite noisy image
- The castle on the background, the famous Rocca Calascio, was heavily lighted. What a fantastic show... but the dynamic range was way too high for my camera and for a "standard" bracketing approach.
Many problems to face... but I had something in my mind.
The final picture is composed by 17 shots.. the most challenging blend work I've ever made.
Processing the foreground
First, I had to deal with the noise. There are many ways to do it: low ISOs an longer exposures, software noise reduction, better camera (ehehe)... But this time I decided to go with a "astronomical" approach. The technique is not new at all, but it is mainly used by astro photographer, when shooting at the stars. It is known as "stacking".
The main idea is to take different shots of the same subject. Because the noise is a random signal, in every shot it will not affect the single pixel in the same way; the average value of the pixel will be less affected by the noise.
This method has the great advantage of preserving the details; moreover, using many "short exposure" shots, I decrease the risk of blurred images (for example, in case of wind that could move my tripod). Of course you have to take MANY shots.. not just 2. For astro photos they suggest around 50. I went with 10, and for me it is ok.
For astro photography, there are many softwares that can do it automatically. But how to stack different shots in Photoshop? Quite easily, using smart objects.
First, you have to open all the shots as layers; select all the layers, and then align them (Edit-> Auto-align layers). Now, with all the layers still selected, you go to Layer->Smart Objects->Convert to Smart Object. All the layers will be flattened to a single one. Now, the only thing you have to do is to tell Photoshop to use, for every pixel, the mean value of all the layers. To do that, go to Layer->Smart Objects->Stack Mode->Mean. Now it is possible to rasterize back the smart object, to a single layer. And voila!
Let's compare a zoomed area of the final shot, with the same area of the base shot. Click on the images to see them in 1:1 zoom
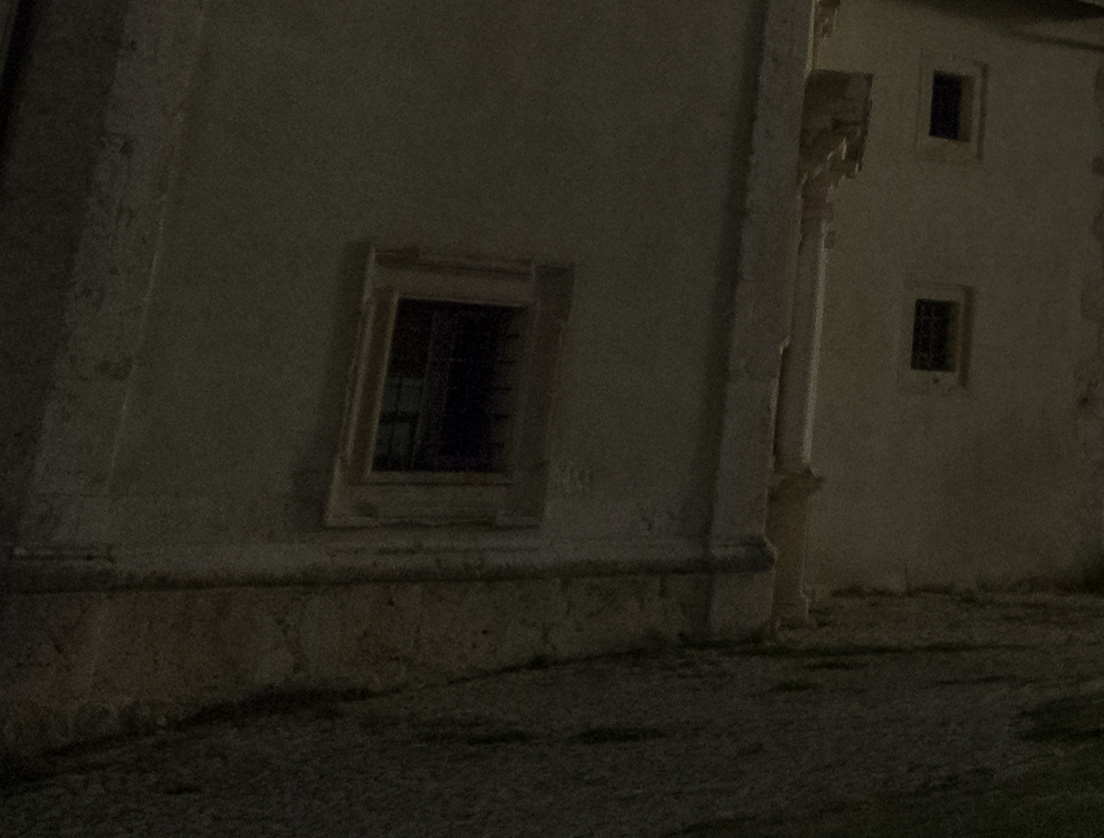 | 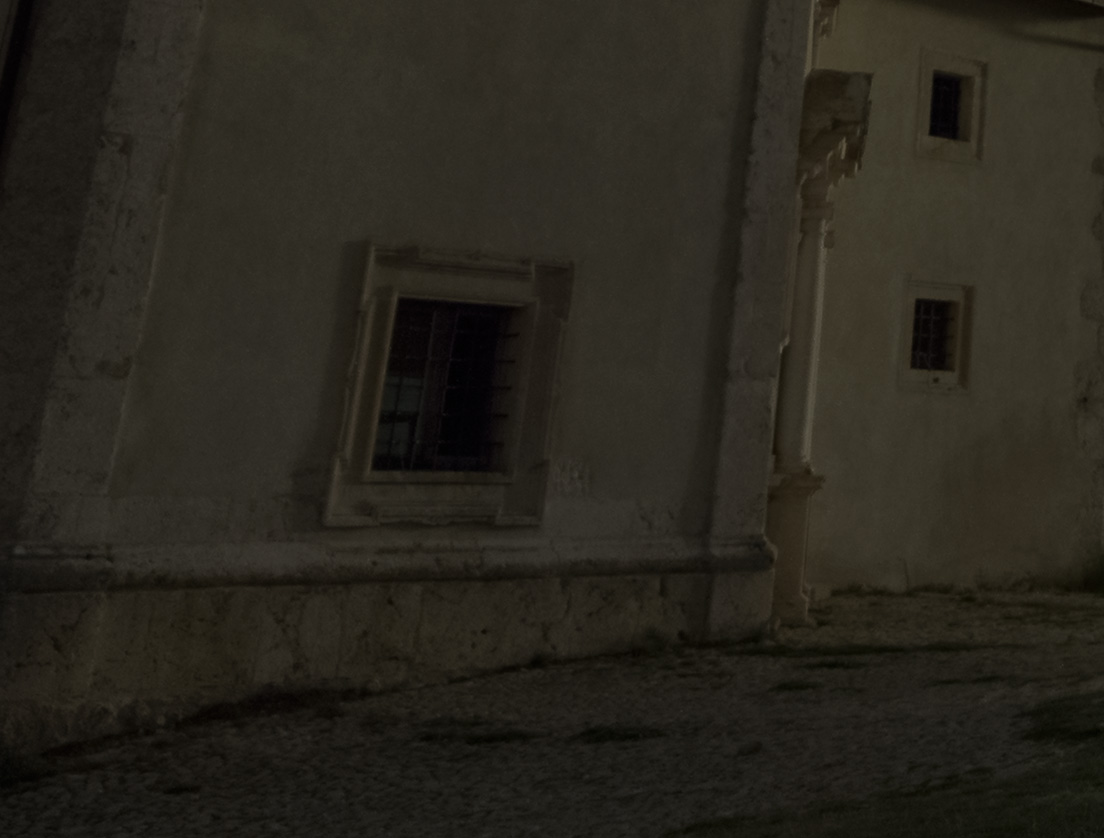 |
| Single shot | 10 shots merged together |
As you can see, the difference is very noticeable!
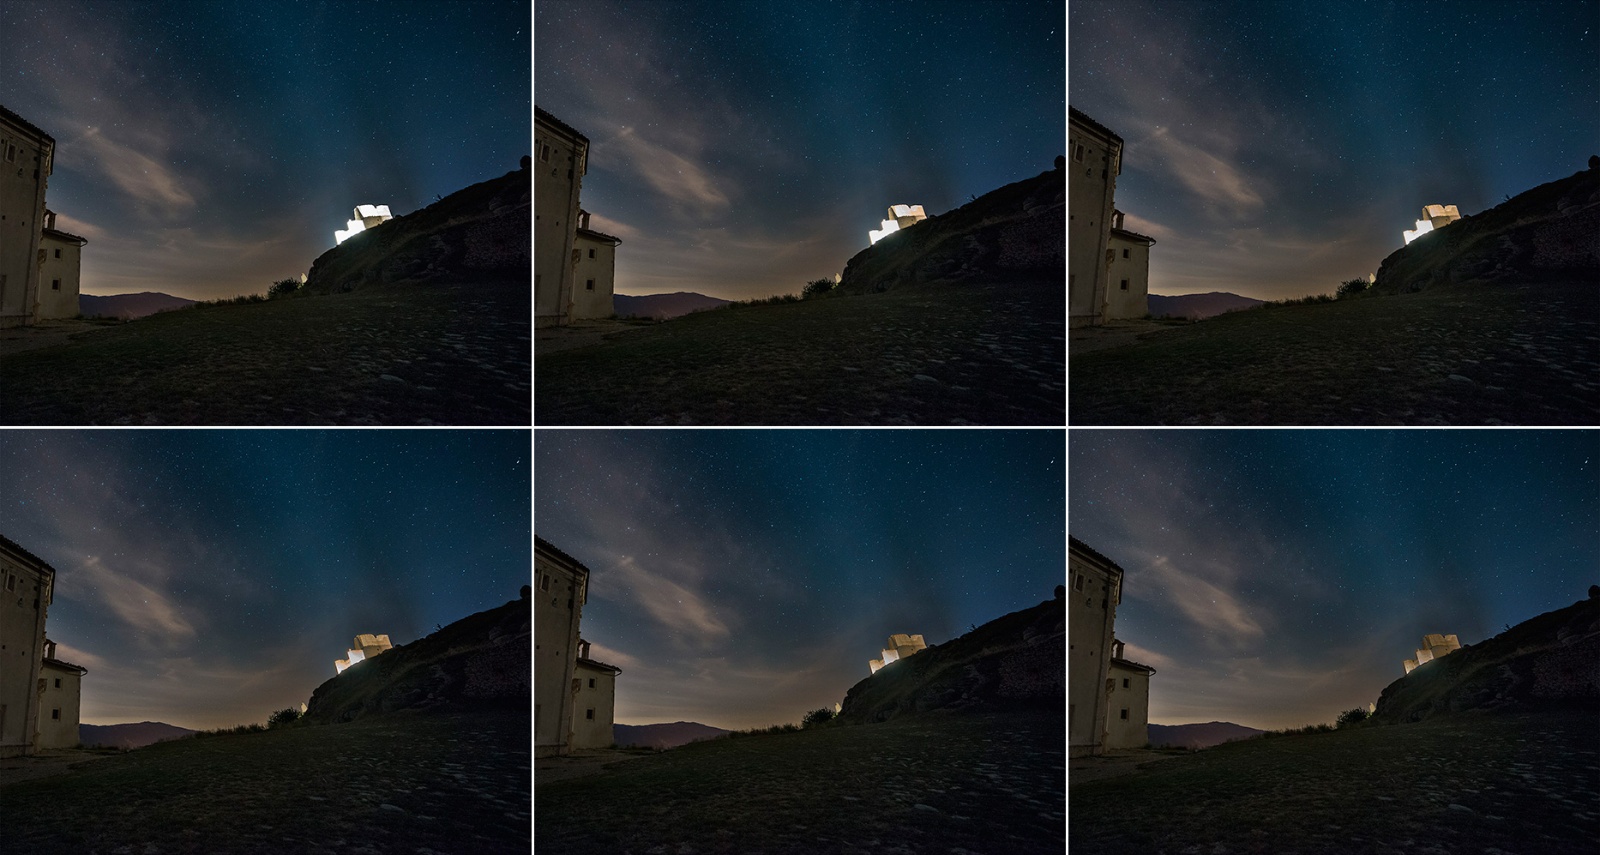
"Fixing" the castle
I had to handle the too bright castle before dealing with the sky. This because I want to fix halos that could result in the blending approach.
The only way to end up with something "natural" (instead of a completely white silhouette, with a disturbing halo around) is to take many underexposed shots, manually adjusting the shutter speed each time. In such a contrasted situation, you can't just take a single shot, exposed for the castle: if you do so, there's no way to merge the 2 images together, keeping a natural look. You will always end up with a "collage feeling", and this is exactly what I want to avoid.
Following the great videos of Jimmy McIntyre ("The Art of Digital Blending"), I understood how to blend together more than one exposure. I created bright luminosity masks, and gently painted in the highlights, starting from the brightest to the darkest. It is not perfect (I still have to master the technique), but the final result is very good!
Processing the sky
For the sky, I had to face different problems:
- enhance the contrast, to emphasize the stars
- reduce the noise, without blurring them
Quite easy (when you know how to do it). Let's start from the noise.
Speaking about the sky, we have to consider the earth rotation... so the stars will move between one shot and the other. For this reason (and for the clouds) I can't use the same method explained above. I decided to use the "best sky" (at least for my personal taste) from one of the shots I took, and work on that one.
First, I used an adjustment layer, to increase a bit the contrast (up the highlights, down the shadows); it's very straight forward, so I don't go deeper in details about it.
For the noise, I used Nik Dfine 2 (both for contrast and color noise), and it did a very good job on the darks. But even if it works very good, it softens the stars too much for my personal taste. So I had to find a way to exclude the stars; the fastest way is to use luminosity masks, to select only the bright spots. So I created my brights masks, and choose the one that better isolate the stars only.
After that, it is very easy and straightforward to add a white mask on the layer created by Dfine 2, and mask out the stars (select the right luminosity mask, and paint over it with a black brush).
That's great!
Final notes
I have to thank all those taught me, during the years, how to deal with real problems in photography... There are many things that can be fixed/avoided in camera. Other things could be done in post production. Starting from a good shot is always the best way to enjoy the journey (and a "must have", if you want to show terrific straight-of-of-the-camera shots on the social networks! ehehe)
But the one I really want to thank in this little article is the great Jimmy McIntyre, with his blog: http://www.throughstrangelenses.com/
For the stacking method, see his video: https://youtu.be/R0-wKsOOPLk