How to stack images for nightscapes and milky way - PART 2
A technique to create noise free nightscapes, stacking multiple images for both the subject and the starry background, using Sequator free software
In the previous post, I showed you some tips to take great night sky shots, keeping the overall noise quite low.
But of course these are tips, not miracles: if you really want great details and, at the same time, extremely low noise... well, you do have to follow additional steps.
The most easy way is to buy a professional camera.... ehehehe, just joking... Of course this is not what I want to teach you! Instead I want to show you how to get the same (more or less) result, with a low budget setup.
The keyword here is post production; there are many ways to reduce noise in a digital image, and there are pros and cons for each. I will try to summarize some options, and then I will focus on a new software called Sequator.
Common approaches
Usually, if you really need a (nearly) noise-free images, you can do one of the following:
Use a noise reduction plug-in
Pros: fast, easy to use, requires a single good shot
Cons: usually, every noise reduction algorithm will remove some (many!) details too. Moreover, the good software is expensive
Stack multiple frames in Photoshop (see below)
Pros: you do not need additional software. The results are generally good
Cons: You need to take multiple shots; you have to do al the work twice, one for the foreground, one for the starry sky. Moreover, depending on the lens you are using, you do have to align the sky shots manually, and it could be a mess.
Stack multiple frames in DeepSky Stacker
Pros: it is a free software, very famous for astrophotography
Cons: this software is not so user friendly (too complex and too many options for my taste); very very slow; the output image is perfect for the sky, but the foreground will be "scraped": you have to do something different for the ground, and then create a composite.
Use Sequator to merge the shots
As you probably know, there is a technique that could be used in Photoshop to merge many identical shots, in order to reduce the noise due to high ISOs; it is called "mean stacking", and I already described it here.
Just to make the long story short, you have to open all the images as layers in Photoshop, align all the layers, convert them to a smart object, and select the stacking mode as "mean".
This technique works great for foregrounds, because they are "static". But it is not possible to use it for the sky, because the stars are rotating (well... we are rotating, but just for you to understand... ehehhe). What can we do then?
We can manually align the sky region of all the layers, and then do as mentioned above. But it is very tricky, and I never obtained good results.
I found a different tool named Sequator, that is simpler than DSS and does a great job in creating a final image without additional steps.
Sequator is really faster than DSS, and solve the problems with memory usage that many users experience with DSS.
Sequator is considered by many ones as the Win32 alternative to Starry Landscape Stacker, a great software that works on Mac only.
Sequator doesn't need to be installed; you just download it from the web site, and unzip where you prefer.
Once launched, the interface is very simple
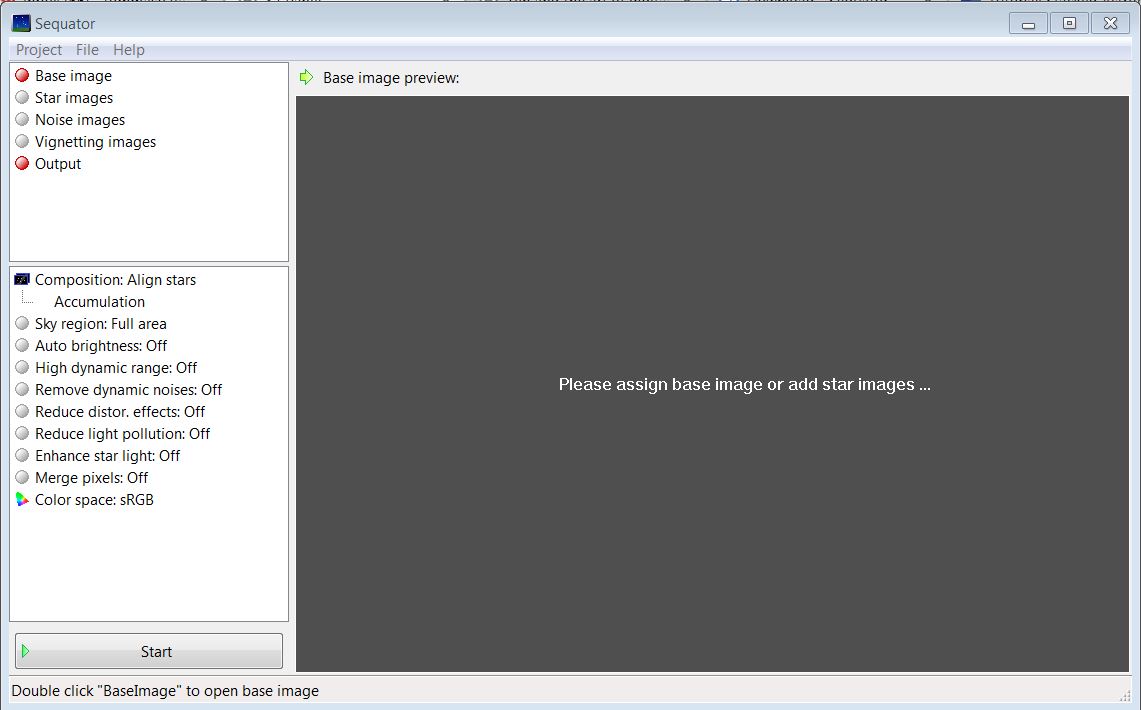
Quick start guide
For the ones that want a freakin' fast approach, this is the recipe:
* double-click on the "Star images" menu, and load all the multiple shots you took (raw files are ok)
* double-click on "Output", and select the destination folder and the name of the final tiff
* in the menu item "Composition" select "Freeze ground". This way your foreground won't be messed up
* click on the menu item "Sky region", and paint all over the sky region (the starry sky should be green)
* activate the "Auto brightness" option
* click Start
Et voilà! Sequator will produce a final image, merging the shots and drastically reducing the noise (both of the sky and of the foreground): after a short amount of time (30s to 2 minutes, it depends on size and number of the images) you will find the final tiff file in the selected folder.
Now you can open it in Lightroom, ACR or Photoshop, and follow your normal workflow.
The complete approach
Here my suggestions for the complete (and detailed) workflow.
IN LIGHTROOM
First of all, start from lightroom: here I usually make only 2 adjustments: lens profile and temperature. For the lens profile, I usually do not check "remove chromatic aberrations" because sometimes this option remove also some color from the stars. Speaking about temperature, the idea is to have a black sky, with no blue or violet cast. This way you will preserve the real colors of the milky way (and you can give your creative touch later, in post production).
Here do not lower the exposition (I still work with images a bit too bright, due to the ETTR approach), I do not touch the clarity, etc. I want to start from a clean base image.
Now synchronize the settings on all the shots I took, and then I export the shots as uncompressed TIFF files.
These are the files I will load into Sequator.
IN SEQUATOR
Let's switch to Sequator. Load all the produced TIFFs as "Star Images": Sequator will automatically select the middle one as the Base Image. If you had the chance to take also some dark frames, load'em under "Noise images" (a dark frame is an image taken with the same settings of the "real ones", but with the lens cap on. This way you have a reference for the electrical noise due to the long exposure, and the software will subtract it to the final image).
Then select the output path and file name: I suggest you to use a meaningful notation; for example, if you want to try two different options (e.g. Autobrightness on/off), you can append something like -ab for the one obtained with the parameter enabled.
Now the most interesting part: in "Composition" menu, select "Freeze ground". In this composition mode, Sequator will stack the images 2 times... one for the sky, and one for the ground. But remember, when you select "Freeze ground" you do have to define the sky area: for doing this, go in "Sky region" menu, and select "Irregular"; "paint" on the sky to select it (pay attention not to paint over the ground; in case of errors, you can erase right-clicking on it).
There are few parameters more that could be useful:
* autobrightness: you can try to enable this, it will increase the contrast of the image. I make some tests, but usually I prefer to leave it off, and work on the contrast in photoshop, later.
* Remove Dynamic noises: useful if you didn't have dark frames.
* Reduce light pollution: not bad, if you shot in a heavy light polluted environment. Usually I enable it, except when extremely dark
* Enhance star light: enable it for a very starry sky. It creates a strong impact image, but usually I prefer to leave it off, for creating more realistic shots. But it worth a try!
Below you can see the settings I used for a real life example; as you can see from the name, I used the options autobrightness, enhance star light, remove dynamic noise:
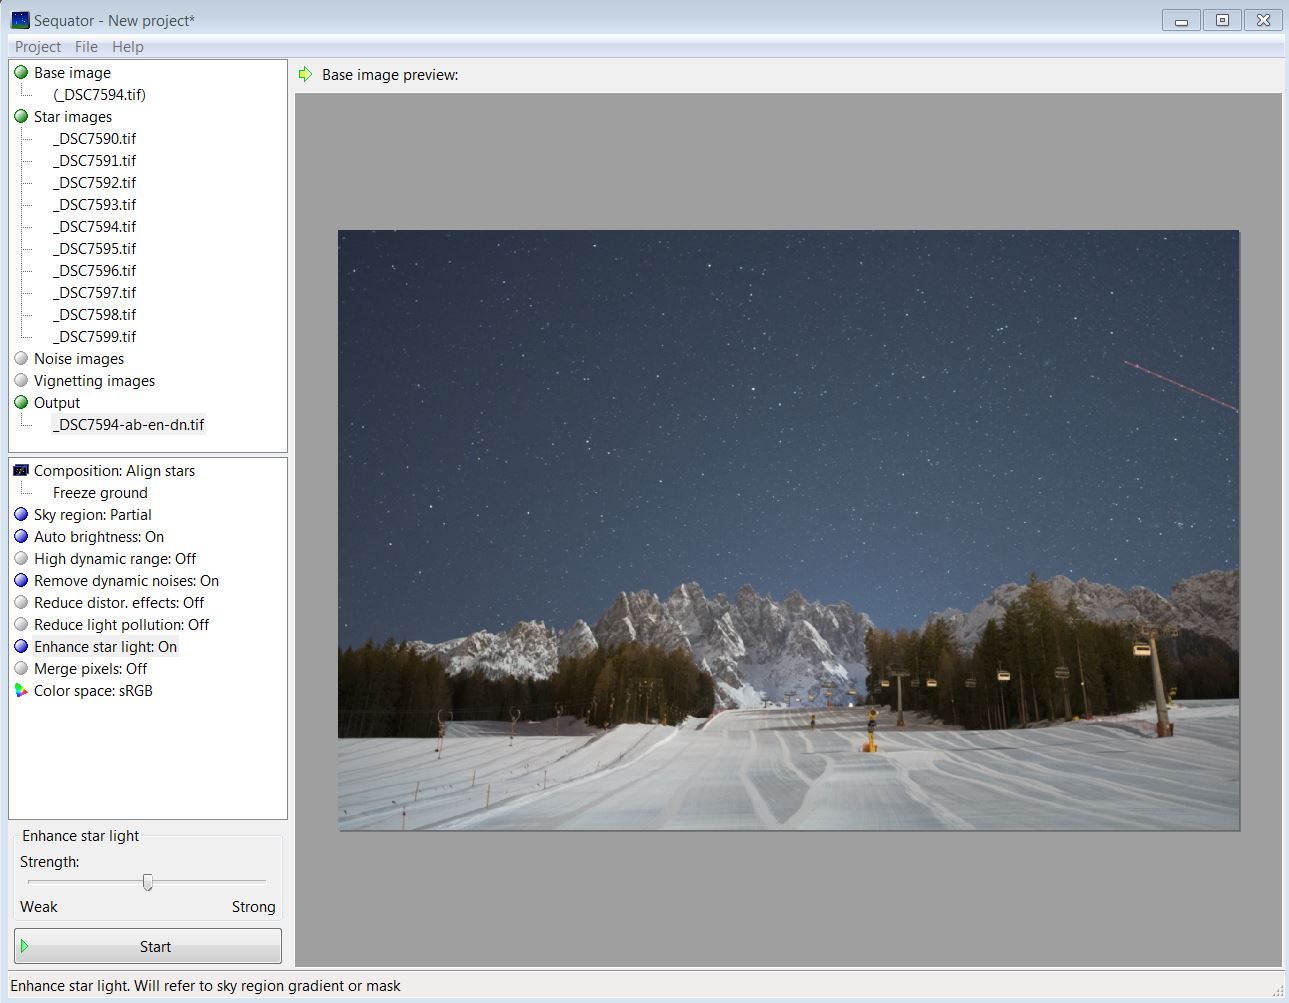
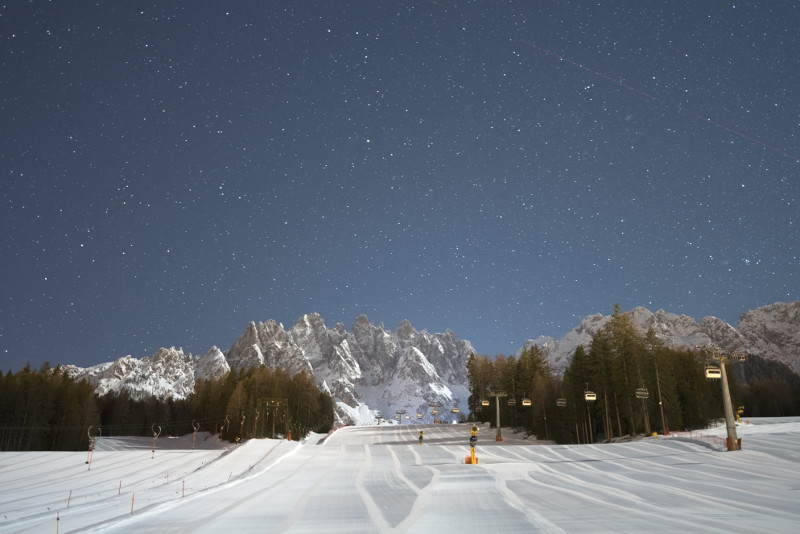
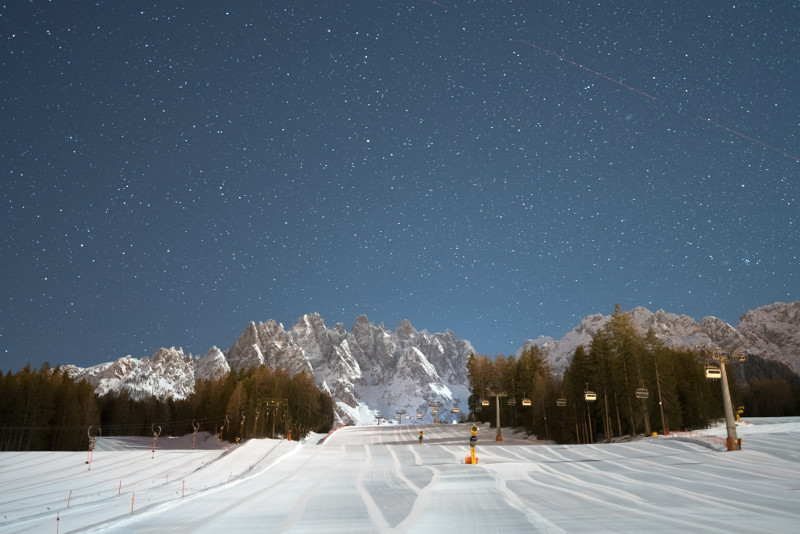
As you see, there is a trail of a plane. If you want, you can ask Sequator to automatically remove it, simply enabling "selective" in the menu item "Freeze ground".
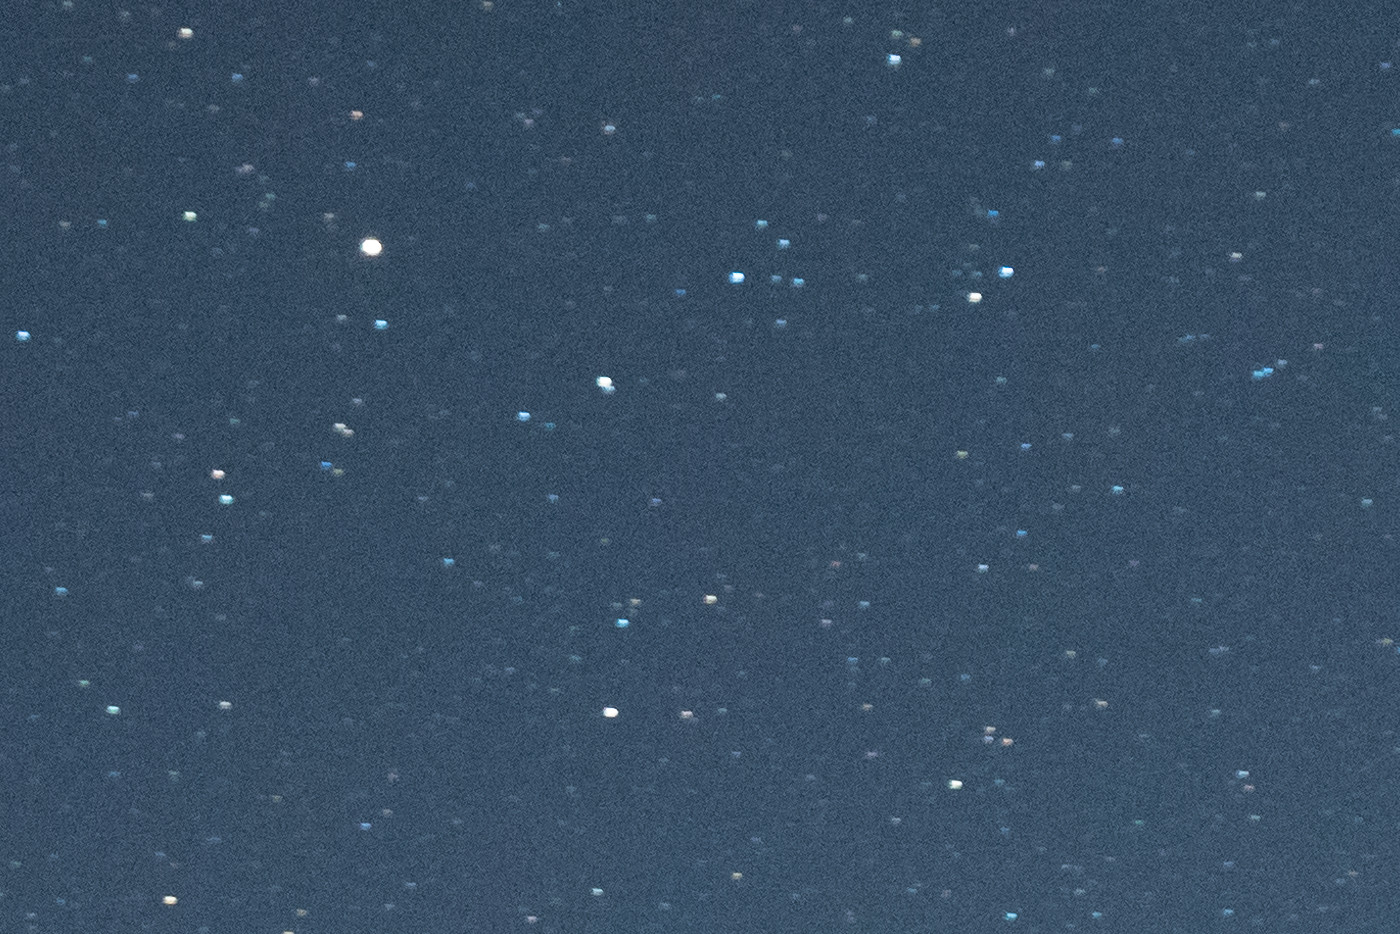
Here you can see the difference between the original file, and the one processed in sequator (crop 100%):
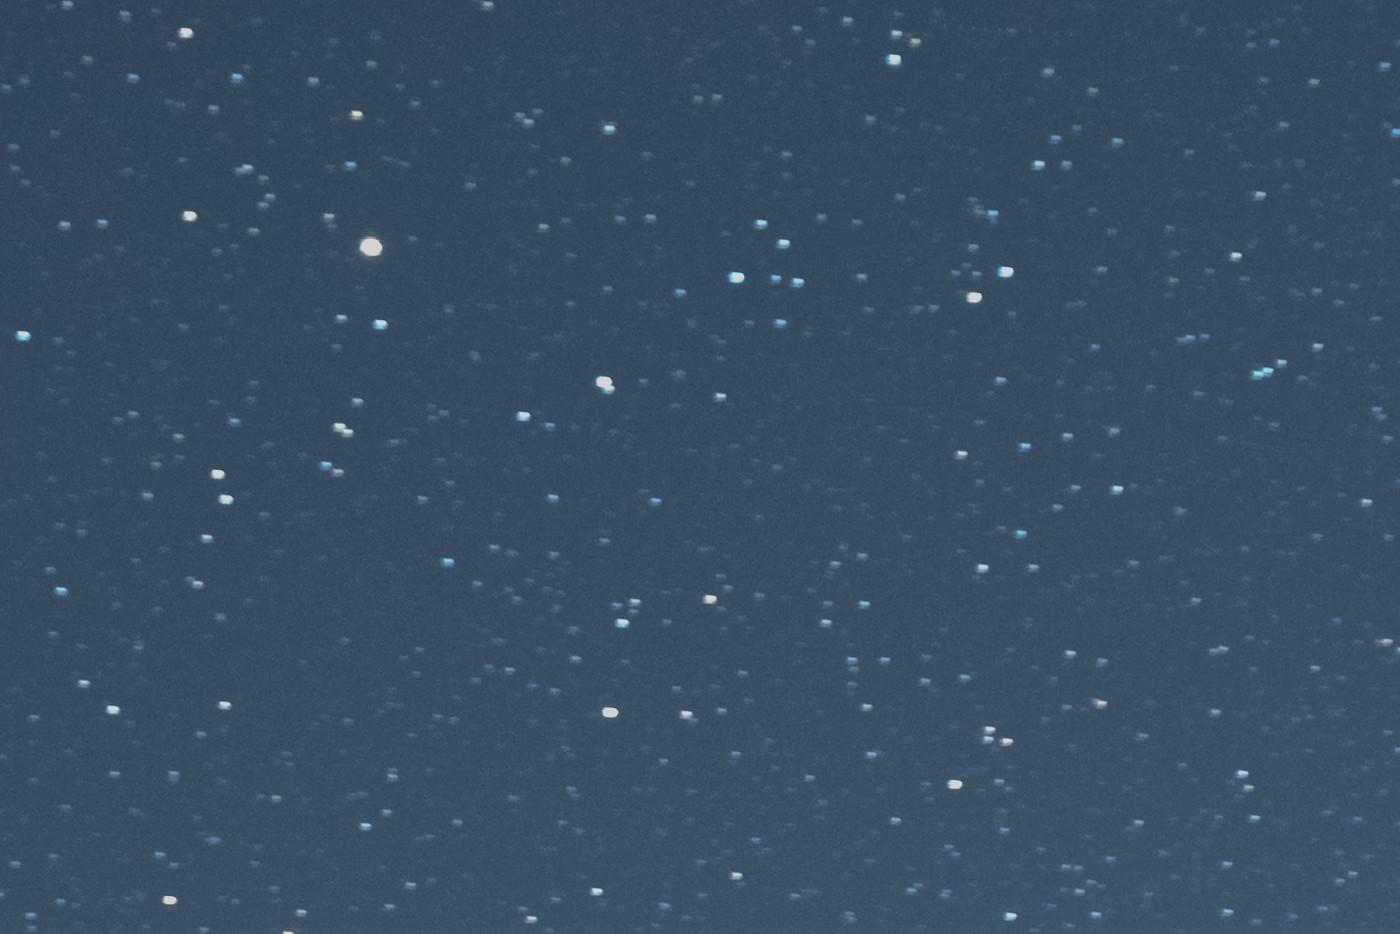
Below some comparisons, just for you to have a rough idea of what the settings do:

Conclusions
In the previous article, I tried to give you some very important tips, that you should follow if you decide to start the incredible lifetime adventure of nightscapes. Following those suggestions, you will be able to take good shots, keeping stars as pins and at the same time keeping the noise as low as possible.
In this post, I showed you how to use Sequator to stack the images you took (hopefully following my previous suggestions). Why to use Sequator, when you can do similar things with other approaches? Because it is a very fast and intuitive way to stack images, it does a great job in reducing noise on high ISO shots, and it creates an output image that is ready to be finalized in Photoshop (without the need of double processing, or difficult cut-and-paste work).
Sequator is considered as the windows alternative to Starry Landscape Stacker, a great software that works only on Apple.
Of course it is not perfect (there are situation in which a different approach can give better results), but I really suggest you to make some tests and see if you like this great little tool.


